 Use this command to highlight areas of curvature across your mesh model. Experimenting with the Curvature Type options will display different results for analyzing curvature. Some Tips are offered below.
|
Screen Pick
|
Optional Information
|
Step 1
|
Select the mesh you want to analyze. You can pick from the graphics window or from the Browser.
|
You can select a mesh first and then select the command icon.
|
Step 2
|
From the command dialog, select from the available Curvature Types.
|
The analysis results are displayed in the graphics window.
You can modify the Curvature Type and pick Analyze again while the command dialog is displayed.
|
Step 3
|
Select the Analyze button to update the display with the current selection.
|
|
|
The following command options are available:
•Mean / Gauss
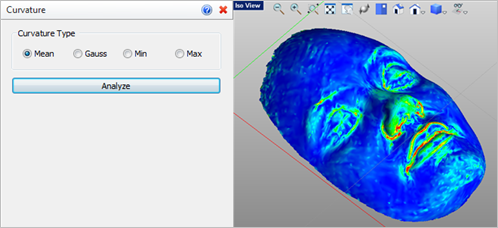
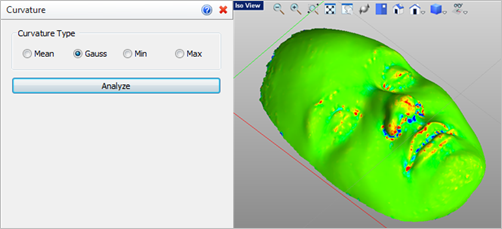
Mean and Gauss are two different smoothing algorithms used to display curvature across surfaces. Select the one best differentiates the curvature on your mesh.
 Mean Curvature Analysis Results  Gauss Curvature Analysis Results |
•Min / Max
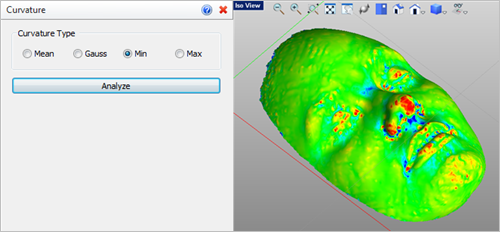
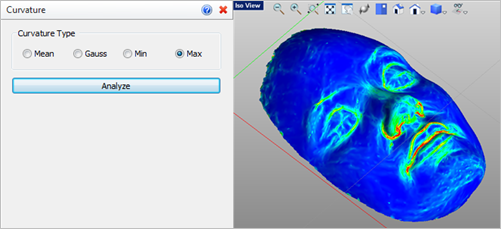
Select Min to graphically enhance areas of minimum curvature on your mesh. Select Max to graphically enhance areas of maximum curvature.
 Min Curvature Analysis Results  Max Curvature Analysis Results |
|
 Abrupt changes in Curvature: Use Curvature and Reflection Lines to show abrupt changes in facet curvature tangents on your mesh model. If unwanted curvatures or protrusions are found, try using the Smooth and Re Mesh commands and then analyze your mesh again to see the difference in curvature results. Abrupt changes in Curvature: Use Curvature and Reflection Lines to show abrupt changes in facet curvature tangents on your mesh model. If unwanted curvatures or protrusions are found, try using the Smooth and Re Mesh commands and then analyze your mesh again to see the difference in curvature results.
 Imported Point Cloud Data: The Curvature method is useful for analyzing mesh models created from imported point cloud data! Refer to the Create Mesh from Point Cloud command for more information. Imported Point Cloud Data: The Curvature method is useful for analyzing mesh models created from imported point cloud data! Refer to the Create Mesh from Point Cloud command for more information.
 Analyze before Printing: It is ALWAYS a good idea to use these Analysis techniques before sending your mesh model to the 3D printer. They can reveal areas of concern that can be fixed, saving you valuable time and money! Analyze before Printing: It is ALWAYS a good idea to use these Analysis techniques before sending your mesh model to the 3D printer. They can reveal areas of concern that can be fixed, saving you valuable time and money!
|
 Tips for Repairing your Mesh: VisualCAM provides tools to allow you to fix and repair many irregularities in your mesh models, saving you valuable time and money! Stitch & Close can fix "cracks" along mating facets and close open meshes. Auto Fix can do the same and more including fixing any incorrectly oriented facets. Reduce, Re-mesh and Smooth can fix a variety of irregularities. Diagnose can check and fix edges, triangles and vertices. Check can verify that your mesh model is positioned correctly for your selected 3D printer. Tips for Repairing your Mesh: VisualCAM provides tools to allow you to fix and repair many irregularities in your mesh models, saving you valuable time and money! Stitch & Close can fix "cracks" along mating facets and close open meshes. Auto Fix can do the same and more including fixing any incorrectly oriented facets. Reduce, Re-mesh and Smooth can fix a variety of irregularities. Diagnose can check and fix edges, triangles and vertices. Check can verify that your mesh model is positioned correctly for your selected 3D printer.
|
|
|
![]() Use this command to highlight areas of curvature across your mesh model. Experimenting with the Curvature Type options will display different results for analyzing curvature. Some Tips are offered below.
Use this command to highlight areas of curvature across your mesh model. Experimenting with the Curvature Type options will display different results for analyzing curvature. Some Tips are offered below.


