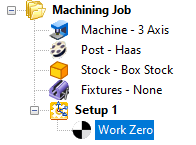
When you zero your CNC machine for a job, you can tell VisualCAM where this Work Zero location is. Your G-Code coordinates will then be calculated from this location. You can also have multiple Work Zero locations defined in your part. If no Work Zero is defined, then coordinates are measured from the WCS origin of the part.
To Create a Work Zero:
1.Select the Program tab.
|
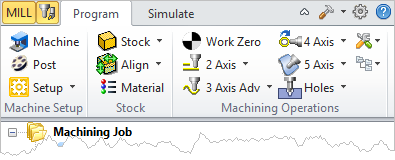
2.![]() Select Work Zero from the menu to display the dialog.
Select Work Zero from the menu to display the dialog.
 Dialog Box: Work Zero |
3.You have the option to Pick the Work Zero location. Select Pick and then select the pick button to select a point on the part. Its coordinates are populated into the dialog.
4.Optionally you can select Set to Stock Box and then select from the three available options Highest Z, Mid Z and Lowest Z.
5.Then select the Zero Position. The nine locations to choose from.
6.Optionally you can also output the Work Offset Register. To do so, check the box to Output Work Offset and then accept the 54 value or change it. This value will be posted to your G-Code file as G54.
7.Pick OK and you will see the Work Zero added to the Machining Job.
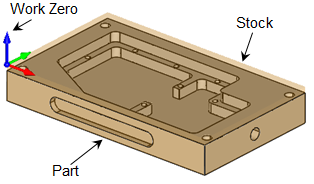
In the example shown below the Work Zero is set to the Stock Box, Highest Z, South West.
|